Thursday, October 13, 2011

Thinking about Halloween!

Oh my goodness, it is that time of year again, where I dust off the seasonal decorations and start to transform the bare summer canvas of my house to it's full glory!  In this part of the world, it begins on the 1st October with the Halloween decorations swiftly followed by the 1st November with the Thanksgiving or Fall decorations and then without even a breather inbetween -  the Christmas decorations come out on Black Friday (that's the friday immediately after Thanksgiving Thursday to anyone not in the know).  FINALLY all the decorations go back in the boxes around about the 5th January....with only a brief affair with some Valentines decorations and Easter decorations until the 1st October rolls by again.

So basically I am already 2 weeks behind with the "seasonal decor"!!  Not that I go as mad or as crazy as some of my neighbours....who in reality I am deeply jealous of as they go in all guns-a-blazing with this time of year...but I do like to add some of my own festive markers of the season. 

Remembering that I am behind readers!  Here is the pumpkin that I carved last year....I am unsure of where I got the craft ideas or inspiration but I know that I tried to copy something similar that I saw on the web.  Now all I have to do is try to come up with something better for this year!

Wednesday, October 5, 2011

Simple pleasures

Our house, whilst not full to the brim with toys, has plenty of toys that any young pre school aged child could spend hours playing with....but do they get the attention they deserve??  Of course not!  Do you begrudge buying them? Of course not!  The pleasure of presenting a small child (or any child really) with a new toy and seeing the look on their faces is a magical moment.  Another magical moment that most parents treasure is when they can visibly see their child's imagination run riot...and I got to see that yesterday.  Now most toys are designed to stimulate the mind into play, but the object de jour yesterday was an empty abet ENORMOUS cardboard box....armed with only a handful of crayons, this box turned quickly from race car into space ship into hidey hole.  The best bit???  It was free! (well if you don't count the object I had delivered inside of course!).  Anyway, I thought I would share this magical moment with you all, enjoy.


And of course, this box had super magical powers and drew the cat into it's spell too.  Two for the price of one! Not bad for a humble box!


Friday, September 30, 2011

Double Whammy Tablecloth

Hi all,
Long time no posts - no good excuses - sorry!

But hopefully, I am back with a blaze!  And in my defence, I have been logging all the crafty stuff I have done in the past few months, I just haven't actually written the accompanying blog posts.  So please forgive me with this super easy tutorial for a double sided "cheap" waterproof camping tablecloth.

To let you in on the background as to why I needed a tablecloth, myself and my family recently took a Labour day weekend camping trip to the west of Texas for a much needed break.  Luckily the weather was on our side and stayed relatively cool for the whole weekend - which made for sleeping under canvas a better experience that I was envisioning!!!  So in preparation for said trip, a couple of shopping trips to Bass Pro and Cabelas was high on the agenda....being a seasoned camper, I knew roughly what we needed and what we didn't from the sea of camping equipment currently available on the market.  One thing I knew we needed was a decent wipe clean tablecloth to put on the weathered tables at the campgrounds....not for making things pretty, but for hygienic reasons, (but don't get me wrong, if I have to have one - I wanted pretty!).  So after quickly discounting the Bass Pro and Cabela shops for not having a suitable item - it was off to trusty Walmart....and Walmart came up all aces!


Two, yep TWO vinyl tablecloths for $1.50 EACH!!!!  Now that is my kind of pricing!  And yes I bought 2, as the backing on this wonderful (but cheaply made) cloths is a weird webbing like material which would catch and pull on any wood splinters or anything really except smooth smooth plastic.  So the double sided tablecloth was born...


As it happened, one cloth was bigger than the other and so I came up with the idea of a quilt like blinding to the edge for purely aesthetic purposes.  First I laid them down on the floor, smoothing out as I went.


Then I folded the edges over, mitering the corners.  To keep everything in place, I used my clothes pegs instead of normal pins as the pins would have made unnecessary holes in the vinyl, rendering the waterproofing redundant!


Being really careful, I sewed along the two edges.  As with most "normal" quilts, you blind the middle together to prevent the cloth from slipping - but remember that weird webbing material that was on the underside? Well it stuck together like glue, so thankfully I did not have to make any holes in the middle of the tablecloth.  Yay for weird webbing!


Ta Dah......the finished cloth!!!!!!!


Tuesday, April 26, 2011

Scrap Letters

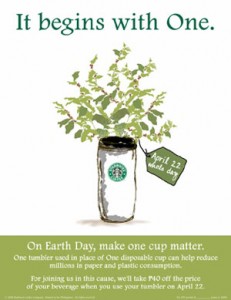
Motivated by Earth Day, I challenged myself to come up with something eco-friendly AND stylish.  What I eventually came up with was "Scrap Letters", using exclusively materials I had on hand....I didn't have to run out to the craft store ONCE!  They came out much much better than I had hoped and I plan to cut out the rest of my name using the same fabric.....and later on, in different fabrics, the names of my husband and son.  The fridge is never going to look the same.

It is a very easy process, but here is the tutorial:

Supplies
Advertisement fridge magnet
Scraper
Craft knife
Mod Podge
Spray adhesive (or you could forgo this and be super careful?)
Strong adhesive
Printer


 Take an advertisement thin fridge magnet, (the ones with the cheap paper toppers are infinitely easier to work with versus the more expensive laminated kind), and remove the top layer of paper carefully!  It didn't take long but I worked slow as to not to pull or distort the magnet backing. I wet the paper several times to loosen the surface and used a scraper for the tougher bits. 


Next, print out on plain paper the letters that you want, making sure that the size you choose FITS the magnet you have just cleaned!  I used Cooper Black typeface in size 175, I thought that the roundness of the letters would be easier to cut.  Glue the selected fabric to the magnet using super strong glue...(on a side note, I would like to add that the fabric scrap I am using - I scored from a friend. It's vintage, and I think that the design is from or about the year of my birth and I can remember having a similarly looking fabric on a chair in my room as a kiddo...not that I am saying I am vintage - JUST the scrap, heh ha).

Moving on! With a craft knife, cut out the letter and with a smidge (technical term...!) of temporary adhesive place on the fabric/magnet and trace the letter onto the fabric, remove paper and cut out the letter, also with the craft knife.

To finish, cover the entire thing in Mod Podge, let dry and then stick it on your fridge!


Glorious!!!  Now onto the rest of the letters!!

Friday, April 22, 2011

Earth Day 2011

Hello everyone, I hope that you all went to Starbucks with your refillable mug today to get your free coffee?  I certainly did!  And don't forget that if you go to Lowes tomorrow, they are giving away free trees.....yep, FREE TREES! Of course I had the wrong information and went this morning.....but at least I got to peruse the vegetable plants in relative peace and quiet. 


I have had a brainstorming session recently with ways to reuse and recycle some common household goods but in the meantime I will leave you with some ways to get ecofriendly with your morning Starbucks order...

1. Did you know that you can order your drink in an actual ceramic mug!  Of course, this only works if you are going to be drinking your beverage in-house but I thought I would voice that option.

2. And if you are drinking your beverage in-house, then that muffin you ordered can be put on a ceramic plate instead of in a paper bag.

3. My local branch has a basket at the end of the counter filled with used grounds for your garden.  Best part is that it is FREE, like all the time.  Go and look to see if you can score some.

4. Ask a crafty friend or yourself to knit/make/create a hot beverage holder.....just reducing that small piece of cardboard can make all the difference.

5. If you are getting a second cup, get a refill....not only will you save money, (refills are cheaper!), you save the wastage of the second cup.

6. Bring your own travel mug.....you save money (about 10 cents a cup) and you will feel amazing about not using a disposable one!

Wednesday, April 20, 2011

Chocolate and Easter

Being an English lady in the USA, I tend to miss most of my very long list of missed food items right around this time of year and in turn I get a little homesick.  (Not that the tornado weather we are having in Texas is nothing but fun fun fun!) You see, this is the time of year that we english brave the weather outside long enough to have our first barbeques of the season, even though approximately 30 minutes afterwards, all go inside and have copious amounts of tea, but that's not the point.  (BTW, that's hot black tea - with milk - with sugar AND with a biscuit).

What is so different you ask?  Well I'll tell you....at Easter, all the kids (under the age of about 20) get a huge over packaged name brand chocolate egg filled with yet more chocolate from possibly every relative they know.  (I think one year I managed to collect over 10!) Which have to sit on the shelf until Easter Sunday, when (after sunday roast dinner of course!) we gorge ourselves on said eggs until we cannot move.  There are no Easter egg hunts with small plastic eggs hidden in the garden, in fact I don't think I had heard of hunting for eggs until I moved to Texas.  But I do have to admit that I find the egg egg hunt more endearing and a whole lot healthier!  (Something that I will continue, even if I move back to the homeland.)


For the adults, the shops are filled with hot cross buns and everyone around you is shaking off the winter doldrums (even though the weather is still the same from January). Which go nicely with a cup of tea...have I mentioned the tea yet?  Oh how I miss those hot cross buns.....toasted if you please and covered in butter....hhhhmmmmmm.


But the best best best thing of all is........almost everyone has Good Friday and Easter Monday off from work!  Yep, practically the whole country has a glorious four day weekender every year!  Now if you add in the fact that the following weekend is ALSO a four day weekend because of the upcoming royal wedding.  You get a super duper couple of weeks??!!!  Ingenious...no?  It is the perfect time to pack up the kids and the suitcases and have a nice holiday somewhere in Europe......no wait....hold the phone.....that's is exactly what the entire country does end up doing....ah well, we can always stay at home and have a barbeque...or some tea.


For more seasonal ideas check out my blog post for Halloween Craft Ideas

Tuesday, April 19, 2011

Swift Dust Socks

As I was wandering around blogland on the internet highway, I came across a "more complicated that it really should be" post on how to turn discarded/cheap chenille socks into resuable static swiffer cloths.  Wanting to recreate those socks, my first stop was of course Biglots and as luck would have it, they were selling what I can only think was their christmas stock chenille socks at a really low price.  So I managed to score 3 pairs at $3....$1 a sock!


BUT instead of a laborious cutting and sewing session...I simply pulled the ever-so-stretchy sock over the swiffer base and voila! One instant machine washable swiffer static cloth!


Sunday, April 17, 2011

What to do...

I still (if I can) hang my washing outside to dry, especially in the summer.  So when I saw these at the dollar store, I just had to buy them.  But now the dilemma is what to do to make them pretty??

Thursday, April 7, 2011

Picture Placement

Being an Interior Designer - you get to learn some some neat tricks sometimes, tricks that make you really look like you know what you are doing! Well this trick takes the guess work out of hanging anything on your walls without the need for multiple nail holes or hours of frustration.  I use this method especially when I am hanging multiple items and need to artisically arrange the grouping.

It's quite simple really but I will share it with you now.

First, pick your wall space and the picture/mirror that you wish to hang.

Then gather your supplies...scissors, tape and newspaper.


 Cut, shape, tear and tape the newspaper sheets in the EXACT shape of your chosen wall hanging.


Place the shaped newspaper on the wall with some low-tack tape and move around to your heart's content.  Stand back and check the positioning several times and WHEN you are ready and only when you are ready - you can put the hook in the wall using your favourite method. (My favourite are the hercules hooks that leave minimal damage and need no tools whatsoever).


Ta dah!

This method also works when you need to choose or reposition large pieces of furniture or to redesign a room's layout.  (Note, it helps enormously if you have each piece of furniture's dimensions before you start) With a completely empty room, lay sheets of newspaper on the floor (no need to tape this time) in the rough shape of the sofa, coffee table, TV unit.  You can then move around the newspaper until you get it how you like it - take a photo from a good vantage point and then get to moving the real furniture!

This way you can double, triple, quadruple make sure that you can move around in the space and if everything fits PLUS you save a lot of back ache!


Monday, April 4, 2011

I am still here....

...but am struggling with some personal issues.  Please bear with me as I still have a whole host of ideas just waiting to share with you....I promise!

Gem
xxx

Tuesday, March 29, 2011

Melting March Madness

Oh the sheer joy of creating something old into something new and thus saving the planet one miniscule piece at a time! 

It all started one innocent day when I took a trip to my local Michaels (for something completely unrelated to this post of course!) and spotted a "Crayola Crayon Maker" on the shop floor.  So into the basket it went and I eagerly drove home and ripped into the box like a kid on christmas morning raring to try the new contraption.  WELL, to say that I was disappointed was an understatement.....I know that I shouldn't have expected much and the toy is really just that - a toy, so I can't really complain too much.

ANYWAY, it got me to thinking....is there a better way of creating new crayons?  Turns out that there is, and it is much better AND cheaper AND more satisfying.  This is not a new concept to some, but I thought it was so worth sharing.  So here is my ever first tutorial on crayon making....enjoy!


The only equipment you are going to need is some small silcone molds, broken crayons, a baking sheet and an oven.  I found this pretty (and cheap!) molds in the childrens cooking section at Hobby Lobby. 
See - I only paid $1.99 each!
 After removing all the paper from the crayons, I tried to organise the colours into "like minded" collections.  I was also trying to fill the mold completely without overfilling.
A close up of my colour matching.

 Bake in a 250-275F oven for approximately 10 to 12 minutes.  Allow to cool completely before turning out.
 And here is the finished product! I initially thought that the fruit molds would yield the best results but I fell in love with the teddy bear crayons as soon as I saw them. 


Sunday, March 27, 2011

Inspiration!

Inspiration - it can hit you at any moment and sometimes in the weirdest of places but more often than not, it can leave you without any warning.  Otherwise known as a flash of brilliance, a lightning bolt, a light bulb moment, inspiration is worth listening to or in the case of myself, writing it down so that I will not forget it later on! Inspiration is the starting point from where great things can happen.


So in an effort to preserve my more fluid thoughts, I always carry around with me at all times a writing implement and some form of paper.  (Side note - I have always done this although it was cemented into me when I attended University, studying Design).  However, the paper I carry around may or may not be an actual sheet of identifiable paper, nine times out of ten it is a sales receipt, (Starbucks receipts being the common theme!), more than once a paper napkin, but they do act as a wonderful reminder for me once I get home.  Speaking of which, I have a brightly coloured hard backed journal at home to which I can either expand on the idea, glue the receipt into, stick a ripped out magazine article or in general doodle in the margin.....the latter being the most apparent!  And so it is from this very journal that I will be relying on now to bring forth future blog posts, so my fingers are crossed that the ideas are interesting and perhaps more apt, that I can read my own handwriting.

In closing, my point I am trying to make here I guess, is to embrace your Eureka moments, remember them, expand them and more importantly remember little old me when you are rich and famous! 

Friday, March 25, 2011

Downton Abbey

For Christmas 2010, my lovely aunt (who resides in Ireland) thought that I might enjoy a new TV show called "Downton Abbey", which was screened on the UK ITV television circuit a while ago.  So she sent over the first series box set at the end of November and because of the snow/bad weather/postal overload/whatever, it didn't arrive until almost the start of February......which meant it took almost 3 months to arrive!!!!  (Not that this point matters much).

I must admit that the thought of watching a TV show that I had never heard of before was a little daunting, which is why it has taken me a while to get around to watching it, but it was a period drama and I LOVE period dramas....only problem was to find a spare slot of 6 hours in order to watch the DVD's.  And I am not sure if you are like me, but if you are and you have a box set of unwatched TV shows AND they are good ones - I tend to hit the play button at the end of each episode in a gluttony feast!

Luckily, I was presented with an opportunity to watch them this week (whilst on a doctor ordered day's bed rest) and I absolutely loved it - so much in fact that I googled it as soon as I was finished!
 
So if you (like me!) are not aware of this brilliant piece of small screen cinematic wonderment....here is the synopsis:

"Set in 1912, Downton is the home of the Crawleys, who have been the Earls of Grantham since 1772.  In the drawing rooms and library and beautiful bedrooms, with their tall windows looking across the park, lives the family, but below stairs are the other residents, the servants, as fiercely possessive of their ranks as anyone above.  Some of them loyal to the family and are committed to Downton as a way of life, others are moving through, on the look out for new opportunities or love or just adventure.  The difference being that they know so many secrets of the family, while the family know so few of theirs."

I could go on and on and on about the historical accuracy OR the beautiful costumes OR the stunning interiors OR the brilliant plot lines OR the great actors.  But I won't spoilt it too much for you, just watch it and I promise you will be hooked.  So I am just going to leave you with some inspirational interior shots that make me miss my parents dragging me around each and every stately home as a child......and to think I dreaded those "cultural" days.


I have checked on Netflix, (for those who reside in the USA of course), and season one is currently available to rent (and on "instant play" no less).  And whilst googling it - I found out that PBS aired some of the episodes back in January 2011 on it's Masterpiece slot.

Wednesday, March 23, 2011

Harvest festival

It's that time of year when the weather starts improving to the point that we actually take a long and hard look at the damage winter has done to our back and front yards.  We envision what our spaces should look like so that we can enjoy them to their full potential in the summer, and of course the sweat equity needed to fulfill that potential, (even if we have no intention of doing the work ourselves!).

With that in mind, and after a trip to my local hardware store (for something completely unrelated I must add), the store reminded me that it was "that time of year" to start the seedlings.  Not that I am an experienced gardener by any stretch of the imagination, but I do have a yearly habit of "trying" to grow tomato plants and each year I "try" another seedling.  Which normally fails epically!!!  Although last years trial of Jalapeno plants was a roaring success, (something I would like to recreate this year).  So this year's doomed optimistic seedlings are: Tomatos, jalapenos and broccoli.  (With broccoli being the new kid on the block).  I'll be adding to the list of vegetables/fruits later on when planting season is upon us, but for now - they are the only seedlings.

Some time ago, someone gave me the secret for a no cost option for starting seedlings. So enjoy and I hope that I have inspired some green fingers to start planting.And if anyone would like to know exactly how to make the seed pots, let me know and I'll try to post a tutorial.


Monday, March 21, 2011

Welcome

Welcome to the inaugural post of my new blog.  As you can see, my blog site has been expertly designed, abet not by me, but by someone far more talented....my dear friend Erin Letz.  Who co-incidentally blogs herself and was the driving force for me to start blogging. So if you have a chance, please mosy on over to her blog Life Abundant.

So please bear with me until I can find my feet in the blogging world as I have a lot of ideas floating around in the vacuum where my brain should be located.  Not all of my ideas will follow a set theme or format nor on some occasions, make sense as to why I am pondering them, but I hope to at least inspire my readers at least once. 

As soon as I learn how to post a picture on this site - I promise that I will upload my second ever blog post.

Ta

Gem